
IN13 Bargraph Clock

A few years ago, Jon Ellis designed a giant single digit 7 segment clock using Russian neon filled bargraph tubes. A number were sold by Jon and the clock can be seen here operating on YouTube. I decided that it would be fun to make my own version.
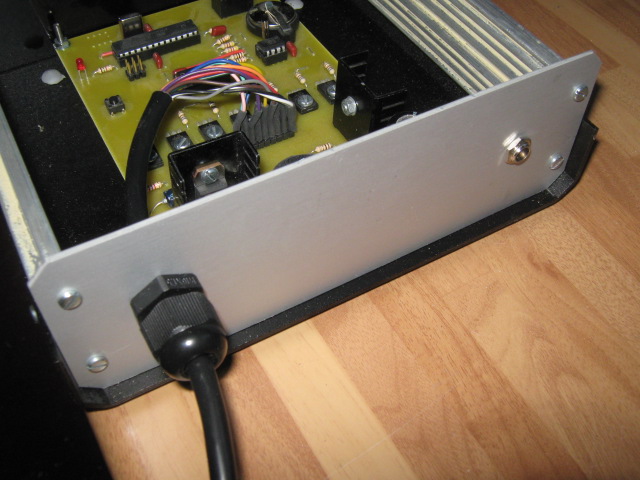
This clock uses an Atmel atmega168 AVR as the workhorse, a DS1307 clock chip and a simple USB serial connection for setting up the clock, setting the time, choosing the options required and so on; more on this below. I'm not going to describe how these baragraph tubes work as there is plenty of information on the web such as here. The transistor driver I use in this design is from this information sheet. Note that I use the IN13 tubes which have a third "keep alive" or "primer" electrode and a lower current requirement than the IN9 tubes.
Revision 1 (11-12-2012): Full source code written for GCC-AVR C compiler available for download below.
Schematic, PCB and construction
Eagle Files
The Eagle files can be downloaded below here. Or right click on these images to view or save them.


The PCB design is based on a single sided 100mm x 160mm board shortened slightly to fit the case I'm going to use. The built clock is in three parts: a standard wall wart PSU giving 12-15 VDC (no more to say), a box containing the clock PCB and the wall mounting 7 segment display unit.
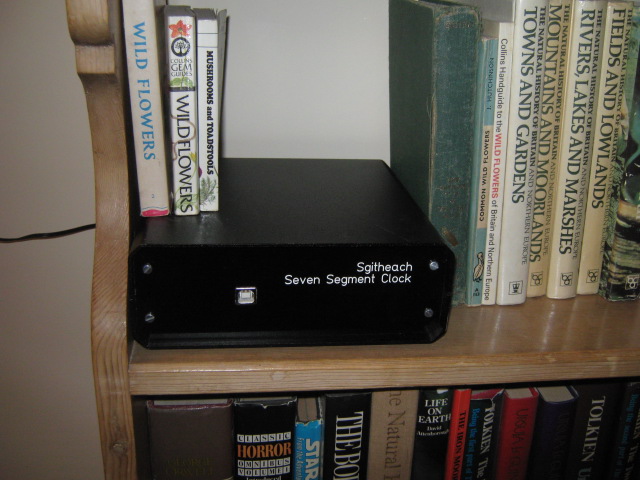
Clock PCB Box

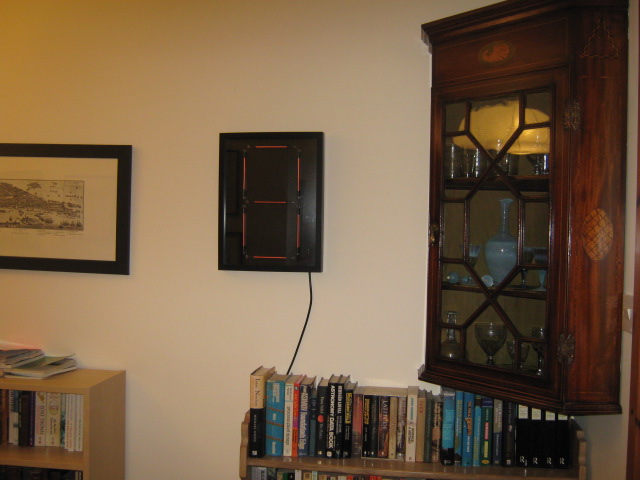
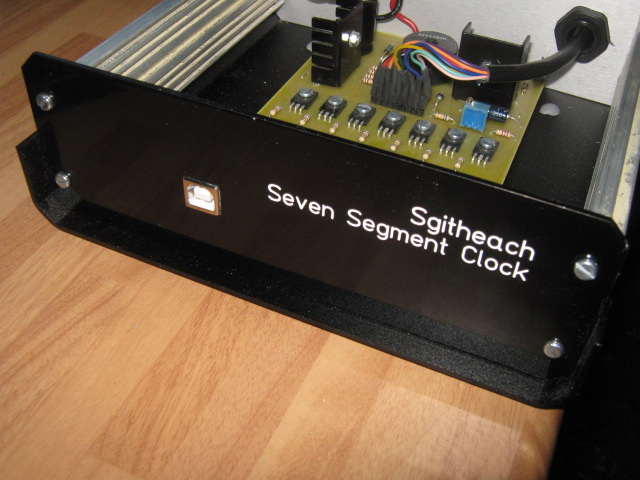
The overall colour scheme was to be black - black box, black frame and background for the clock display. I used a Metcase M5501119 - expensive - but I was aiming to get the required "permission" to have this clock in the hall of our house…

The front panel of the box as bought as part of the case is aluminium, originally I intended just to paint the supplied panel myself and have no lettering. I wanted to give a good appearance, so I designed a front panel which was black powder coated, engraved and white filled. Contact me if you want more information on the panel design and its manufacture. The back panel is the plain, unadorned aluminium.
See the picture gallery below for the case with the board and panel fitted.
Clock Display
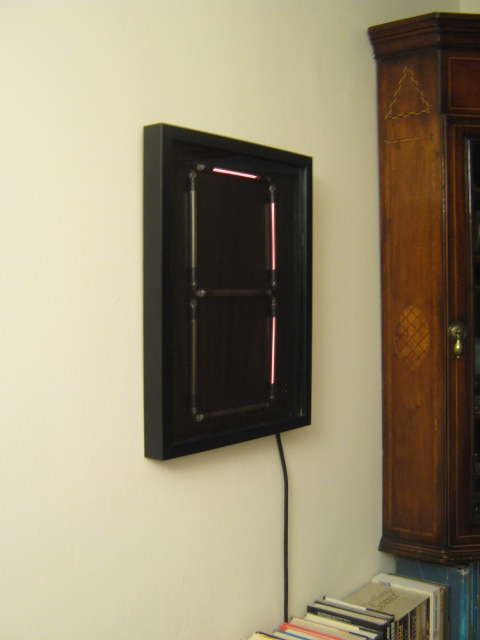
For the display, I adapted a 30cm x 40cm RIBBA picture frame from Ikea. This frame is deep enough to put a 1cm spacer between the glass and the mdf backing sheet. The spacer and the mdf sheet were all sprayed matt black. The bargraph tubes are mounted using black cable ties and the three electode wires taken through to the back of the mdf sheet. I used black electrical tape to mask the "keep alive" electrode glow.
The back of the display panel carries the wiring and the 220k current limiting resistors for the "keep alive" electrode connection to ground (one per tube). I bought some 10 core cable (black outer of course) and used 7 cores for the bargraph cathodes, 2 cores for the HV for the common anode supply and 1 core for the common ground connection to the resistors. The end result was a bit of a bird's nest to be honest; but an out of sight bird's nest.
See the picture gallery below for the finished frame.
Software
The executable, source code and fuse settings can be downloaded below. This version automatically corrects for GMT/BST change over using European rules. It would be easy to add other rules - contact me if you are interested.
Photo Gallery
What's more, I haven't been asked to take it away…
Downloads
You should look in the "/Bargraph Projects/Giant 7 Segment Bargraph Clock" folder.
Afterword
Alan Flowers in Cork built this clock into a single case. Here's his build:

Appendix - Clock Commands
The clock uses a simple text command interface using the USB connection and whatever terminal software you wish (at 57600 baud no parity, one stopbit). It knows 14 commands:
- ADJUST [+/-n]
- BUILD
- DATE [dd-mm-yyyy]
- DEFAULT
- DISPLAY [seq]
- ERASE [seq]
- HELP
- HOUR [12|24]
- MODE [GMT|AUTO]
- RESET
- RUN [hh:mm,hh:mm]
- SPEED [dhehp]
- TIME [hh:mm]
- ZERO [ON|OFF]
The code accepts a series of commands from a PC which can then be unplugged until changes are wanted. The commands that alter the clock display are saved into the NVRAM in the clock chip so are preserved if you turn the clock off.
Commands can be upper or lower case, or mixed case - the code doesn't care.
The commands that don't take any parameters are:
- BUILD - display build and version information
- DEFAULT - load a set of "factory" default values into the display settings
- HELP - a simple list of commands as an aid
- RESET - force the control to reset - the same effect as turning off and back on or pressing the reset button, just done in the software - it can take upto 2 seconds to perform
The following command take an optional parameter. Using the command without the parameter will return the current setting. Parameters can have extra spaces and when multiple parameters are required they are comma separated and can have extra spaces. There must be at least one space between the command and the first parameter.
[] - shows an optional parameter list
| - optional parameter choice eg ON|OFF means ON or OFF entered
- ADJUST [n]
Default is 0
eg ADJUST -4
The time keeping crystal is far from perfect and you will find the clock slowly gains or looses time. This is an adjustment that is made once per day (at midnight) by adding or subtracting a few seconds. So when you first run the clock, run it for a couple of months and note how many seconds the clock looses/gains and work it out as a whole number of seconds per day. The main influence is temperature so run the clock where it is finally to hang.
- DATE [dd-mm-yyyy]
eg DATE 9-5-2011
This will set the date to this value - there is no error checking so DATE 54-12-8765 will go in and the clock will try to use it! The date is never displayed, it is just used for the automatic BST/GMT conversion.
- DISPLAY [seq]
Default is ABCDEFG-
This is the order in which the bars are lit. The SPEED command sets the draw speed and the delays that are inserted as the bars are drawn. The bars are:

- or _ is the draw command
Examples:
- DISPLAY ABCDEDFG- will draw are the bars simultaneously.
- DISPLAY A-BF-G-CE-D- will draw the bars top down.
- DISPLAY EF-ADG-BC- will draw the bars left to right.
- DISPLAY A-B-C-D-E-F-G- will draw the bars in a clockwise circular manner (I find A-B-C-D-E-G-F- slightly more pleasing).
The sequence is not error checked - if a bar is missing it doesn't get drawn, if the trailing - is missing then the bars before it don't get drawn, any other letter or character is ignored. The command maxiumum length is 14 characters (A-B-C-D-E-F-G-). The character order ahead of a - is irrelevant so ABCDEDFG- and GFDCABE- are identical in function.
- ERASE [seq]
Default is ABCDEFG-
This is the order that the bars are cleared. Just like the DISPLAY command with the exception given below.
Example:
ERASE D-CE-G-BF-A- erase from the bottom up
the exception to DISPLAY is
ERASE - the bars are NOT erased between digits
this looks good as the characters turn into each other with bars being erase if not required and drawn if required. But it does look odd for times like 9:44 as the 4 and 4 have no transition between them 11:11 and 22:22 are the oddest of all… but the clock is supposed to be provocative as well.
- HOUR [12|24]
Default is 24
12 hour or 24 hour clock mode
HOUR 12 - 12 hour mode (1-12)
HOUR 24 - 24 hour mode (0-23)
- MODE [GMT|AUTO]
Default is AUTO
Force GMT only to be displayed or automatically switch GMT to BST depending on the date - EU rules.
MODE GMT - GMT only
MODE AUTO - switch BST/GMT using EU rules
- RUN [hh:mm,hh:mm]
Default is 00:00,00:00
Clock start display and stop display times. A stop time of 00:00 means that no start and stop will be used
Example
RUN 06:30,22:45
This will mean the display will show from 6:30 to 22:45 - the time is current display time show will change with the BST/GMT change as well. The format must be in 24 hour (obviously).. Only the bars will not illuminate, the stay alive electrodes stay lit.
- SPEED [display,hold1,erase,hold2,pause]
Default is 500,500,200,100,2000
The five parameters are all times in mS and can take values 0 to 10000 (ie 10 seconds).
- display - time take to draw the bars, note that this is the time for each stage of the drawing, so A-B-C-D-E-F-G- will have a draw time for each of the bars illuminated. A value of 0 means the bars appear instantaneously. A value of 10000 is tedious beyond belief. I find values about 100-1000 (depending on the DISPLAY sequence) look dynamic enough.
- hold1 - the time that the digit is held drawn before the erase starts - this makes the digit readable. Too fast and it can be difficult to read the time
- erase - time taken for the bars to be erased
- hold2 - time delay before the next digit is drawn
- pause - the time before the next full display cycle starts
So a whole cycle is
- draw 10hrs, hold digit, erase, hold erase
- draw 1hrs, hold digit, erase, hold erase
- draw 10mins, hold digit, erase, hold erase
- draw 1mins, hold digit, erase, hold erase
- pause
…rinse …repeat
(See also ZERO command).
- TIME [hh:mm]
Set the clock time. This must be 24 hr and in GMT. Seconds is set to zero by the command. The TIME command itself reports clock seconds so the clock error (see ADJUST command) can be measured. The values are not check so you can enter a time like 56:89 and the clock will try to run using it.
- ZERO [ON|OFF]
Default is ON.
Show a 0 if the 10 hrs is zero.
ZERO OFF 09:45 would be shown as 9 ... 4 ... 5
ZERO ON 09:45 would be shown as 0 ... 9 ... 4 ... 5
- Error messages
Eh? - I don't understand the command
Args? - Incorrect number or type of commands, parameter not understood (example ZERO MAYBE)
Range? - a range checked value is incorrect (example SPEED 100,100,100,100,30000)